 |
Installing a B&M Transmission Cooler |
Installation date: 6/11/05
After my engine and transmission both ran hotter than I’d have liked during our whole trip to Hot Springs I knew it was time to upgrade my tranny cooler setup. I’d been running a factory Mopar cooler for a couple of years, and for light duty stuff it was fine, but when the going got tough, the temps got going, up! I hopped on JEG’S website and checked out what they had to offer for transmission coolers. I narrowed it down to B&M and PermaCool, and the more I looked at the stacked-plate design from B&M, the more I liked it. With more fluid passage area, the stacked plate design should be more efficient than the traditional tube/fin style coolers while taking up less space. The cooler I ended up going with was the B&M model #70268 which measures 11” x 7.5” x .75” and is rated for 19,000# GVW. At the time of this write-up, JEG’S lists the 70268 for $45.99 with free same-day shipping, you can’t beat that!
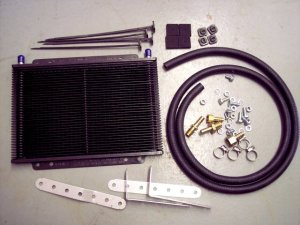 everything you’ll need, almost. |
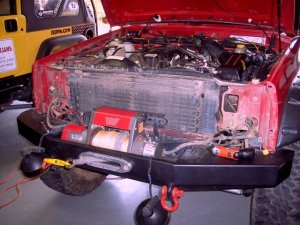 really, it’s not that bad… |
The B&M kit includes the transmission cooler, hose clamps, barb fittings, high temp/pressure hose, and both metal mounting brackets and the common plastic zipties. While I never found anyone that had actually gotten a leak in their radiator from using the plastic zipties, I just felt it was an inferior mounting design and opted to use the supplied metal brackets (I’d already bent some of them up in the pic above). If you go the hard-mount route, the first thing to do is remove the front clip, which sounds (and looks) a lot worse than it really is. The whole clip comes off pretty quickly by removing a handful of screws (phillips and torx), a few nuts (10mm and 13mm), and unplugging all the lights. The headlight wiring harness is clipped along the top of the front clip, so you’ll need to unclip that all before you can pull the front all the way off (a flathead screwdriver works great for popping open the plastic cable clips).
 |
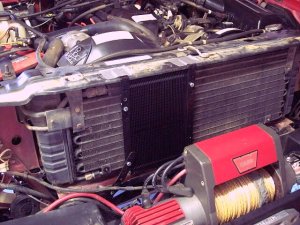 |
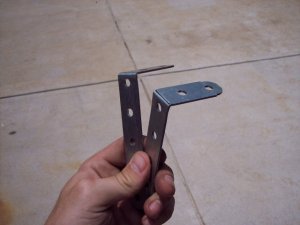
The B&M cooler is small enough that you can mount it in just about any position you want in front of the AC condenser. I chose to mount mine running vertically in front in front of the mechanical fan for a constant airflow at low speeds. I bent two of the supplied mounting brackets into an L-shape using my bench vise and a hammer and put a slight dog-leg bend in a third bracket by hand. The two L-brackets would be for the top, and the dog-legged bracket would connect to an existing hole in the lower front crossmember.
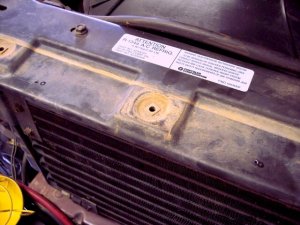 mark twice, drill once! |
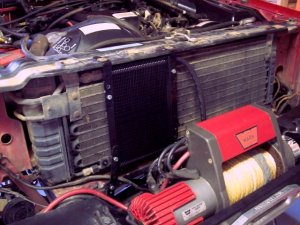 like a glove! |
The L-brackets will sit in between the radiator support plate and an L-brace for the front clip, so the mounting hardware had to be pretty low profile. The sheet metal screws that come in the B&M kit were too tall, so I dug around through my big of left over screws and bolts and found a couple of factory sheet metal screws that would fit. Since the cooler just bolts to the mounting brackets you could just pop-rivet them in place too.
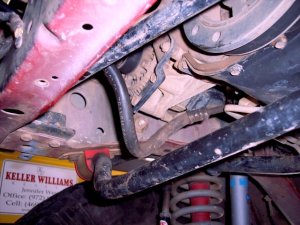 how convenient, the perfect place to cut… |
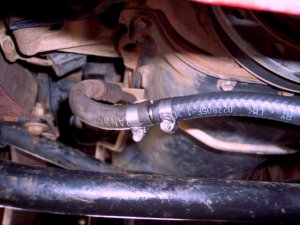 going back to the transmission… |
Now that the cooler was mounting, it was time to do some plumbing. The traditional school of thought says that you want to run the cooler on the return line to the transmission, that way when it goes through the radiator you’re not reheating the fluid you just cooled. If you get a large enough cooler, you can actually bypass the heat exchanger in the radiator all together. The coolant in the radiator is going to be around 190*, so in most cases it’s not going to be doing much in the way of cooling your transmission fluid. If you live in colder climates though, you may want to keep the radiator in the system to help heat the tranny fluid up some in the winter time.
In this install I actually bypassed the radiator all together. So far it’s been working quite well, and I’ve noticed about a 10* drop in my transmission temps vs before when the fluid was going through the radiator. I live in Texas though, so having the fluid too cold isn’t much of a concern for me.
Either way, it’s good to know which tranny line is which. Jeep apparently switched where the lines connect to the radiator sometime in the late 1990s, despite the fact that the FSM for those years still shows the old line routing. Either way, the line coming from the front of the transmission is the feed line, and the line going to the rear of the transmission is the return line (this is the one you want).
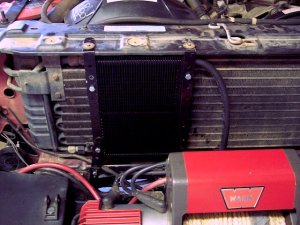
If you opt to plumb the cooler inline with the radiator, you’ll want to splice into the softline section of the return line by the steering box. If you’ve still got your factory air box, you might want to pull it out to give you more room to work with the transmission line. If you opt to bypass the radiator and use the cooler stand-alone, just remove the fitting from the radiator and plug the holes, then cut both soft lines and spline in your between them. Keep track of which line is the feed line and which is the return because you’ll want the feed line out of the transmission to connect to the top port on your cooler. With these types of coolers I don’t know that it would make a huge difference either way, but it’s probably best to have gravity working on your side to help move the fluid through the cooler.
You can screw the B&M barb fittings together and use them, or you can do what I did and run down to Lowes (or HomeDepot, or your local hardware store, etc) and pick up a set of double-ended 3/8″ barb fittings. You’ll also need to pick up some extra hose clamps because B&M only gives you 4, and you’ll need 6 to do this install (2 for the fittings on the cooler, and 4 for the hose connections).
 |
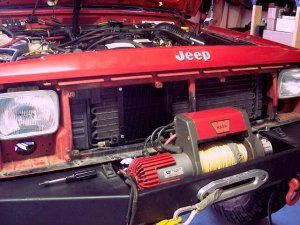 |
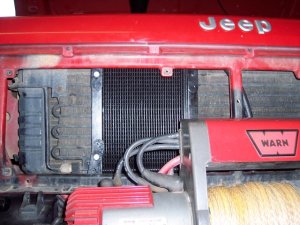
With the cooler installed and plumbed in, I fired up the engine to check for leaks, just in case. No leaks were to be found, so I went to work putting the front end back together. I also took the opportunity to clean up some of the wiring that had accumulated over the years for running offroad lights, rock lights, a winch…
 |
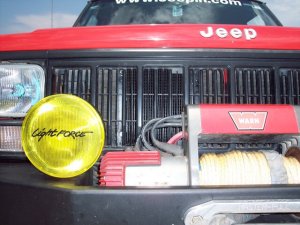 |
The actual grill opening is only about 8″ tall, and since the cooler is 11″ long, there’s a about 3″ of it sitting up behind the top of the front clip. At first I was concerned about this, but both the radiator and the AC condenser extend up behind the front clip and I figure that at low speeds (ie: offroading) the fan will pull enough air through there that it won’t make any difference. As of writing this article we haven’t had a chance to get the Jeep back on the trails yet (I’ll update it once we do), but so far the new cooler seems to be working just fine, keeping the transmission at a comfortable 160*, whether I’m cruising at 65mph down the highway listening to my tires howl or sitting in rush hour traffic reenacting the opening scenes of Office Space.
3 comments3 Comments so far


Thanks for posting this info, really helps. Quick question, just want to confirm… You had to cut both factory transmission lines, correct? That when you installed the 3/8″ barb fittings? 2 total….
Thanks again…
thank u for ur post , i have ur same car, cherokee 1996 sports, and i live i a very hot country (Egypt). i did the job same way u mention it, its working very nicely.
Do i have to put a transmission temp gauge??
[…] I followed this guys setup using a B&M cooler and it seems to be working very well. http://jeepin.com/features/trannycooler […]