 |
Installing a transmission temp gauge |
Installation date: November 2002
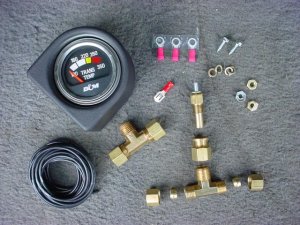
If you’ve got an automatic transmission in your Jeep, and you wheel a lot or tow a lot, it’s a good idea to install an auxillary transmission cooler. It’s also nice to have a transmission temperature gauge so you can keep an eye on things. I picked up this B&M temp gauge from JEGS for about $50. Installation was pretty straight forward and just required some basic hand tools, teflon tape, and something to cut steel tubing with (I actually used a dremel and cutoff wheel but a tubing cutter would be best).
 |
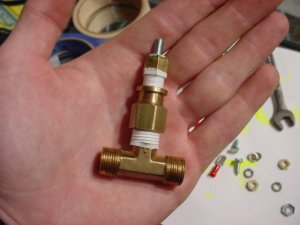 |
The kit comes with all the needed hardware and fittings, and even includes electrical wire to hook everything up with. Two different sized T-fittings are included so that the kit should fit any vehicle’s transmission lines. Our XJ used the smaller of the two fittings. I started out by going ahead and assembling the T-fitting and sending unit. You’ll want to use telfon tape on all the threads to make sure you don’t end up with any leaks.
 |
 |
There seems to be some disagreement among folks as to whether you’re supposed to put the sending unit in the supply line or the return line of the transmission. Personally, I think the supply line is the best line because it will give you a hotter reading than the return line coming from the radiator. I’d rather have advanced warning that my transmission is starting to overheart vs finding out too late.
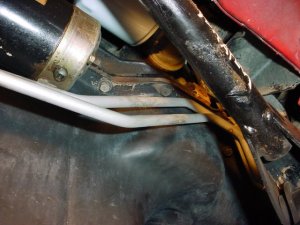
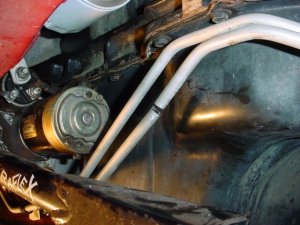
So with that in mind it’s time to figure out which line is which. The supply line runs from the front of the transmission to the top of the radiator (note: late model XJs seem to have the lines reversed at the radiator, so it’s best to follow the lines from the transmission to know for sure).
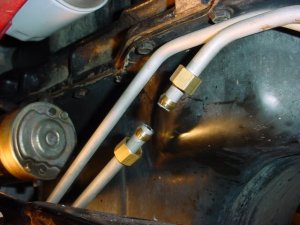
To install the sending unit you’ll need to find a nice straight stretch of tubing where the sending unit won’t be rubbing up against something else. I found such a place where the lines dip down in front of the starter. Once you’ve decided where you’re going to mount the sending unit, mark the tubing and cut it in half. You’ll probably have a little fluid leak out of the cut line, so you might want to have some kind of catch pan under the lines so you don’t get tranny fluid all over the floor.
 |
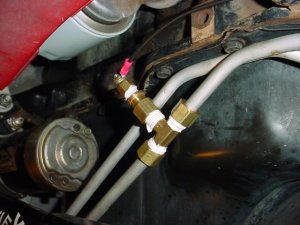 |
Once you’ve got the line cut, debur it as best as you can, then slip the compression fittings on, then the compression collars. Put some teflon tape around the threads on the T-fitting and connect everything together. The sending unit only requires a single wire, which bolts onto the stud on top. When you run the wire down to the sending unit, be sure to keep it off any hot engine surfaces, I ziptied mine along an existing wiring harness that ran nearby.
 |
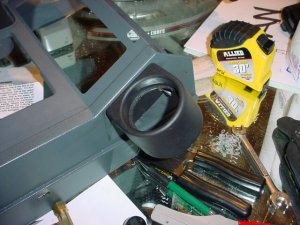 |
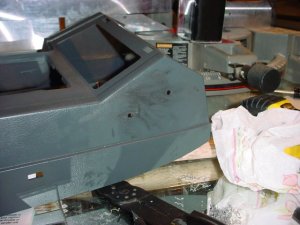
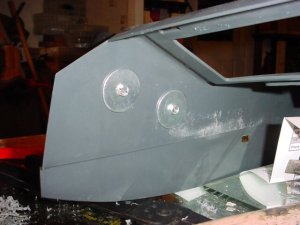
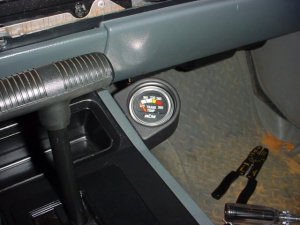
I’ve seen guys who’ve mounted their gauge in the dash where the 12V plug is, but I opted to use the pod housing that comes in the B&M kit and just mount it to the side of the center console. You could probably do this part of the install with the console still mounted in the vehicle, but I went ahead and pulled it completely out. The gauge pod mounts using two bolts (the kit comes with sheet metal screws).
 |
 |
You can see here where I used large fender washers to support the bolts on the inside of the console. This makes for a nice strong mounting so there’s no change that the gauge pod will get knocked off the console (so far it hasn’t caused any interference with leg room though).
On the backside of the gauge you’ll need to hook up 4 wires: 12V+ power, ground, the wire from the sending unit, and a wire for the illumination. The instructions included with the kit will show you which wire gets hooked up where on the back of the gauge. To get the wire from the sending unit inside the cabin, I ran it through the hole in the firewall for the hood release cable (this is where I’ve run all my wiring through). I tapped into the 12V accessory plug to get power to the gauge, and for the ground I simply ran a wire to one of the metal brackets under the console. For the gauge’s illumination I simply spliced into one of the power wires for the lights under the shifter bezel.
The shape of the console aims the gauge pod nearly perfectly at the driver, so I just needed to rotate the gauge itself a bit and it was pretty much perfect for viewing by the driver. One of the nice things about the B&M gauge is that it’s color-coded, so you can easily tell when your tranny is starting to get a little too warm.
4 comments4 Comments so far


Wow this is great! I’ll be adding my gauge this week sometime and I happened across this write up in the hopes of finding an example of where to splice into the line. I mean any straight piece makes since but I’d like to find a place that someone has tried and was successful with. I’m not sure where I’ll mount the gauge though. I think the location you selected it likely to be in the way of the passenger’s knee.
Well I got it installed! Easy to get the sensor in, hard to get everything wired up! I went ahead and hooked it to the out of the transmission, so I’m looking forward to seeing what the temps are going to and from work. Coming home in 98+ degree temps should be a good test. Thanks again for the great write up!
[…] looks pretty straightforward but theres a few ways to do the gauge. Ill be doing mine like this: http://jeepin.com/features/tranny_temp_gauge __________________ – '99 XJ – Lifted, Locked, Stiffened 4.5"/35's July 2013 […]
[…] Check this out. http://jeepin.com/features/tranny_temp_gauge […]