


 |
Custom4x4Fabrication’s TJ bumpers |
Installation date: 1/3/01
When it came time to put new bumpers on the Yellow Mud Machine, I started looking at my options for the front and rear. The front bumper had to have a winch mount and the rear bumper had to have a tire carrier, and the budget was somewhat limited, so that narrowed down the choices a bit. I’ve been extremely happy with the Custom 4×4 bumpers on my XJ, so when I heard they’d come out with bumpers for TJs I had to check them out. The bumpers looked good and the prices were right so it wasn’t long until I had a set on order.
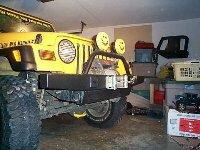
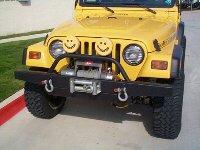
The front bumper is made of two pieces: the main section that sits above the frame rails and a “cover plate” that sits where the OEM bumper does to cover the frame rails. I asked Mike Houlette why he put the main section above the frame rails, and he told me that he did it to give better ground clearance like stubby bumpers do, but retain protection for the fenders like regular full-width bumpers. The first steps to installing the front bumper are to remove the OEM bumper of course and unbolt the swaybar mounts from the frame rails.
 |
 |
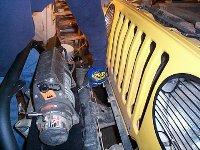
If you’ve got a winch you’ll need to bolt the fairlead on first, then bolt the winch to the bumper before bolting everything to the Jeep. This also means if you’ve already installed their bumper and want to add a winch, you’ll have to take the bumper off in order to install the winch. You’ll probably want to have someone help you with the install here as the bumper and winch aren’t the lightest things in the world, especially when you’re trying to hold up both! The bumper bolts under the swaybar mounts and to one of the holes that are used for tow hooks.
Now bolt the cover plate to the bottom of the bumper and to the bottom of the frame rails where the OEM bumper bolted up. The cover plate ties the bumper into the bottom of the frame rails, adding strength to the mounting system. It’s a bit of a trick to get to the bolts that hold the bumper and cover plate together, but nothing too bad. Once you’ve got it all bolted up and torqued down, it’s time to hook up your lights, get a set of shackles, and hit the trails. Or, if you’ve got their rear bumper to install as well, it’s time to install that!
 |
 |
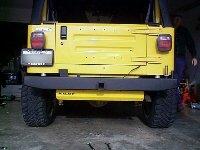
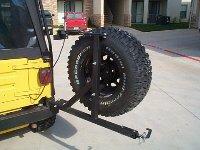
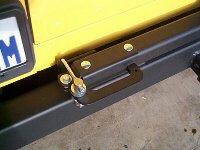
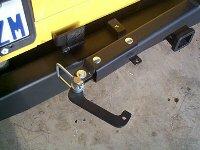
The rear starts out much like the front… removing the factory bumper. Custom 4×4’s rear bumper bolts to the rear crossmember exactly how the factory bumper does, with the exception of an “L”-shaped reinforcement bracket that ties the bumper into the frame itself. This added strength is important because the bumper has an integral 2″ receiver hitch.
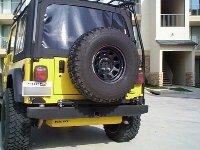
Now it’s time to get the tire carrier assembled. First thing to do is setup the hinge. You’ll need to grease the taper bearings and set them in the hinge, then hammer or press the grease seal into the bottom of the hinge. Now bolt the tire mount to the swing arm. If you got the optional Hi-Lift jack mount you’ll want to bolt this to the swing arm as well. The latch is already assembled on the swing arm, so no worries there. Now slip the swing arm onto the hinge stud on the top of the bumper, tighten down the castle nut, and tap the bearing cap onto the hinge to keep out the crud.
That’s all there is, the installs are really pretty easy, just set aside an afternoon and invite a buddy over to help out. The tire carrier doesn’t seem to rattle or wobble, and it opens and closes easily with one hand thanks to the great latch design and taper bearings in the hinge. So far the front bumper has held up to some hard winching and the extra ground clearance at the corners has come in handy, but I haven’t tried out the rear receiver yet though. All in all I highly recommend the bumpers, and considering their prices, they’re pretty hard to beat.
 |
 |
 |
 |
For more information, contact:
Custom 4×4 Fabrication
11825 S.E. 109th
Oklahoma City, OK 73165
1-405-799-7599 or 1-800-951-C4x4
fax: 1-405-790-0395
sales@custom4x4fabrication.com
http://www.custom4x4fabrication.com