Installation date: 10/16/99
Installation continued:
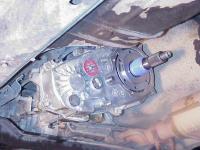 |
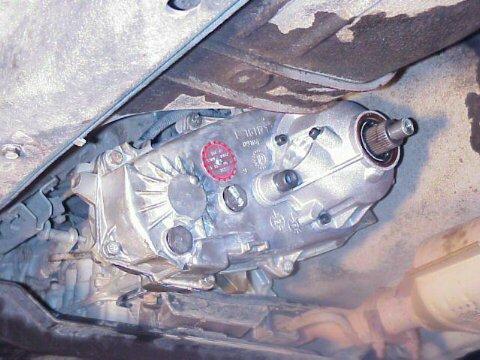
Once you have the back half of the t’case sealed and bolted back up, install the blue speedo gear “thing”. |
| Now apply gasket maker to the new JB tail housing and bolt it to the t’case. The JB kit supplies new metric bolts to use to bolt their tail housing to the t’case.
Reinstall the speedo gear housing and bolt down the housing retainer clip. Make sure you rotate the housing to the correct position so that your speedo gear engages the outputshaft, otherwise your speedometer and odometer won’t work. |
 |
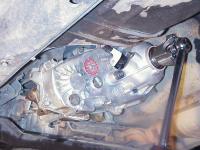 |
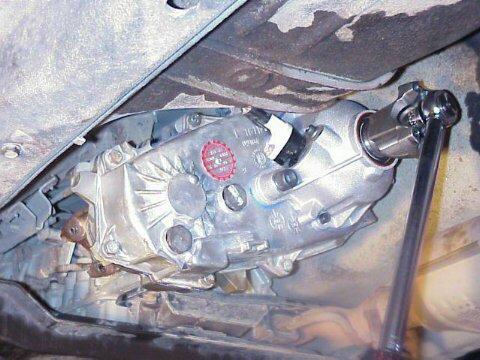
Now slide the new rubber washer/seal (the large star-shaped rubber ring) over the output shaft, install the new yoke and nut, and torque it all down. Do the same for the front yoke. |
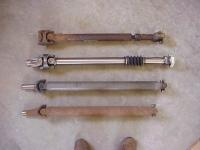
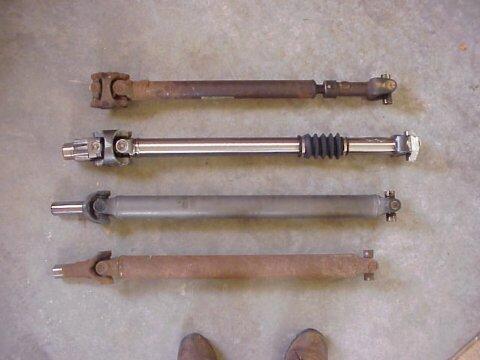
| This what all the driveshafts look like compared to one another. The top driveshaft is my stock front shaft. The next one is the new, heavy-duty CV rear driveshaft from Tom Woods (notice the clearcoat finish, rubber boot around the slipyoke, and output shaft yoke already bolted to it). The dull grey one is my lengthened stock rear shaft, and the last one is a stock rear shaft from a ’96 XJ with an NP231 and Chrysler 8.25″ rear axle. (yes those are the toes of my boots at the bottom of the photo) |
 |
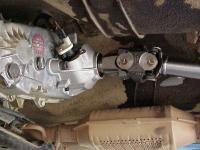 |
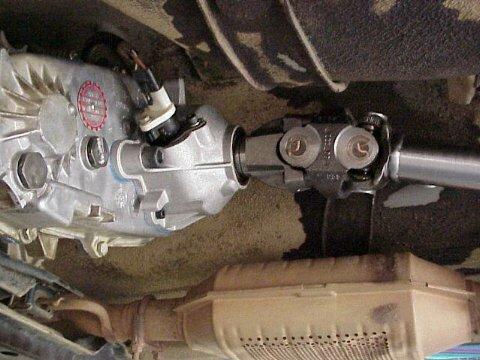
Once you have the yokes torqued down, bolt up the driveshafts, fill the t’case with a liter of ATF (make sure you’ve replaced the drain plug), and you’re ready to go.
One thing I did before bolting the driveshafts up, just to make sure I got everything back together correctly, was to start the engine and shift through the tranny and t’case gears to make sure the output yoke were spinning like they should. |
| If you go with a CV rear drivehshaft, you will have to shim the axle so that the pinion is within 3 degrees of the driveshaft angle. |
 |
| Overall I’ve been extremely pleased with the conversion and driveshaft, I only wish I’d done it sooner. The JB kit was not very hard to install at all, even with splitting the t’case on the rig. Really, the hardest parts were just working with the lockrings (my pliers weren’t quite big enough), pressing the bearings into the synchronizer (not hard, you just need the right tools), and getting the front yoke nut off (air tools are definitely on my wish list now).
The CV driveshaft from Tom is very impressive. Definitely well built. I would highly recommend Tom to anyone looking for a new or custom driveshaft.
For more information contact:
|
Pages: 1 2 3 4


[…] http://www.yuccaman.com/jeep/porc_sye.html http://www.links4jeeps.com/writeups/231sye/3.php http://jeepin.com/features/sye And as the others before said, there's no putting a body lift on an XJ, unless you cut the body […]
[…] http://www.yuccaman.com/jeep/porc_sye.html http://www.links4jeeps.com/writeups/231sye/3.php http://jeepin.com/features/sye It isn't too complicated. Just pay attention to where everything goes. Don't lose the o-ring that […]
[…] http://www.yuccaman.com/jeep/porc_sye.html http://www.links4jeeps.com/writeups/231sye/3.php http://jeepin.com/features/sye The rest wasn't too complicated. Took me several hours, but I was taking my time trying to be […]