


 |
Poison Spyder Customs’ TJ RockerKnockers |
I helped a friend (who’s also named Jason) install this pair of RockerKnockers on his TJ, and I have to start out by saying, WHAT A PAIN!! As we neared the end of the install we were both thinking that for the money, time, and effort, he’d have been better off getting a set of AEV Rocker guards. That’s not to say however, than when it was all said and done and the last bolt had been tightened down, either of us were unhappy with the results. In fact it was quite the opposite. The RockerKnockers looked great and are ultra-beefy, but they sure had us about pulling out our hair at times during the install, or I guess I should say the body bushings had us about pulling our hair out, more on that below…The RockerKnockers are built from laser-cut 3/16″ steel. The slider bar is made of 1.5″DIA x.120″ wall DOM tubing, and is a worthwhile add-on in my opinion. It’s one of the things I originally liked so much about the AEV rocker guards we put on our own TJ.
 |
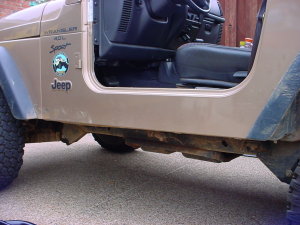 |
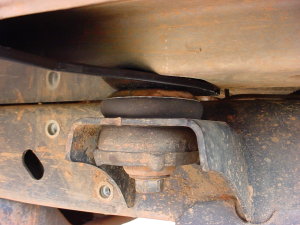
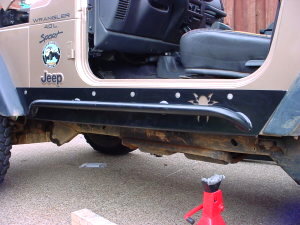
As you can see, the back portion of the RockerKnockers extends far under the body and ties into the rear two body mounts under the rocker panel. These are the only two places where the rocker guards attach to the underside of the body.
To start the install, remove the flare extensions behind the front flares (if you have them) and loosen or remove ALL the body mount bolts. You’ll want to clean the rocker panel so that no dirt or debris gets trapped behind the guards when you install them. If you do have the flare extensions on the rockers, you’ll need to either drill out the nutserts or give them a smack with a hammer so that the RockerKnockers will fit flush against the body.
 |
 |
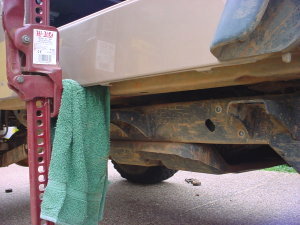
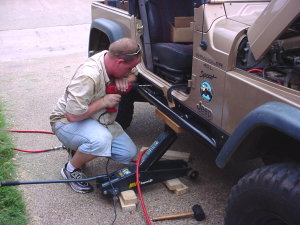
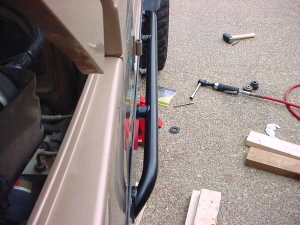
With that done, jack up one side of the body high enough to completely remove the two rear body mount bushings and metal washer-sleeves from under the rockers. The instructions recommend using a floor jack, but we used a Hi-Lift and it worked just fine — however you will put a small warp in the rocker panel lifting the body this way, but it all gets covered up by the RockerKnockers, so it’s not a big deal in my opinion.
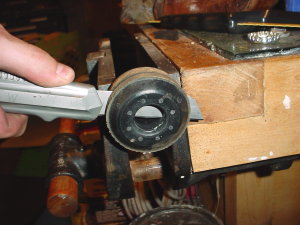
Once you’ve got the bushings out, it’s time to cut them down — which was easier said than done at the time (this is the part that gave us so much trouble)… We tried a hacksaw, a dremel, and my trusty Craftsman sabersaw before we finally decided that the easiest way to cut the bushings was with a box-cutter extended all the way out. By sawing back and forth with the box-cutter we were able to make a nice, even, clean cut all the way through the bushing, albeit a very slow cut…
 |
 |
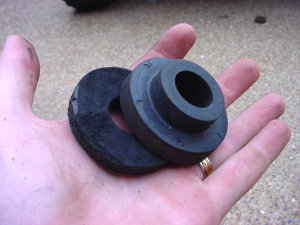
Not only did it take us a while to perfect cutting the bushings, we also had to figure out exactly how much to cut off… The instructions say to cut 3/16″ off the top of the bushing. Well, that only accounts for the thickness of the RockerKnocker itself, it doesn’t take into account the space where the top of the body mount bushing actually fits into an indention in the body itself. Through more trial and error we eventually decided that you really have to just cut the bushings in half to get everything to fit correctly. This also means you have to cut about 1/4″ off the bottom of the metal washer-sleeve that goes through the middle of the bushing (so break out that angle grinder and cut-off wheel!).
 |
 |
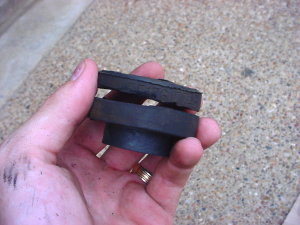
This is what the bushings looked like once we got them all cut down so that everything fit correctly once we let the body down off the jacks. Talk about one squished little body bushing!
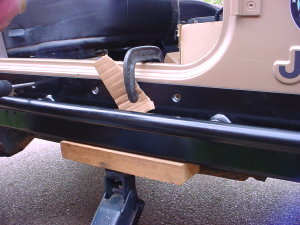
With the bushings out of the way, it’s time to start drilling the mounting holes in the body. You’ll want to jack up on the bottom of the RockerKnocker a bit so it sits tight up against the rocker panel. Then use a c-clamp to hold it in place while you mark and/or drill the mounting holes in the body.
 |
 |
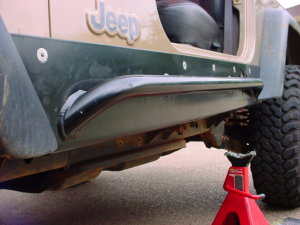
Poison Spyder Customs designed their RockerKnockers so that all the holes are easily accessible to put nuts on the backs of the bolts, so there’s no messing with nutserts like you have to do with the AEV’s. This also means you can leave the guards in place and use them as a guide for drilling the holes and not have to take them back off again. The holes in the guards are counter sunk for the 3/8″ stainless steel bolts which are included in the kit. This gives the RockerKnockes a nice, smooth look once they’re installed.
 |
 |
All that’s really left now is to tighten down all the bolts and make sure you put back all the body mount bolts and tightened them down as well. I would recommend running a bead of clear or black silicon along the top of the guards to help seal out dirt and debris from getting behind them. It might also be worth while if you live in an area where rust is a problem to run a bead of silicon around the back of the RockerKnockers and around the mounting holes before you put them on.
Given Poison Spyder Customs’ reputation and the design and construction of the RockerKnockers, I have no doubt they’ll easily stand up to anything Jason throws at them.
For more information contact:
Poison Spyder Customs
Denver, CO
303-777-4820
https://www.spydercustoms.com