


 |
IPF 968 off-road lights |
Installation date: 2/16/02
Finally, an affordable high-performance-oriented off-road light! Ever since we first installed the Garvin Safari Rack on our TJ in the fall of 2001 we’ve wanted to put a set of four lights on it, we just never found a set that we liked that didn’t cost an arm and a leg. The “economy” offroad lights just didn’t offer the output and beam pattern we wanted, and the lights that did were too expensive to buy 3 pairs of them at once (2 pairs on the rack with a matching 3rd set on the front bumper).
I was talking with my friend Dirk of DPG Offroad fame about general XJ and TJ mods and mentioned wanting some new auxiliary lights for our TJ. He told me about these new 55W lights that IPF recently released that had a special reflector that put out a combo driving/foglight beam. Of course I asked how much they cost, since IPF’s are generally pretty pricey, and was surprised when he told me they retail for about $135 a pair, including a wiring harness. He also said he was currently running a introductory promo on them for $105 a pair, which was even better! I got some more info on them and talked it over with Jennifer, since they were going on her Jeep. She though they sounded great, so I had Dirk get me 3 pairs in mail as soon as he could.
The lights arrived a few days later and I installed them over the weekend. Like most newer headlights and auxiliary lights, these have a clear lens with a faceted reflector that determines the beam pattern.
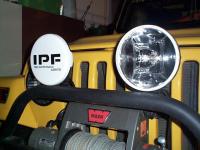
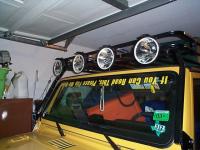
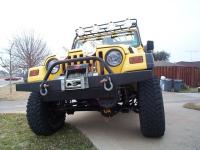
Here’s a photo of the final product below — you can see the dual pattern reflector in the uncovered light on the right. The opaque covers are thick plastic and snap over the lights to protect the lenses when not in use or to comply with local lighting regulations.
The lights looked really nice, kinda like Hella 500s on steroids, but what really impressed me was the wiring harness! And let me tell you, it is NICE.
 |
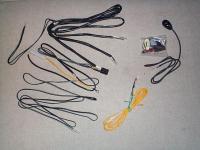 |
All the connections and wires already had weatherproof terminals crimped on, the leads were all precut to length and bundled in rubber tubing, the wires all ran into a plug that the relay snapped into, and the switch was a nifty push-button mouse-style switch with little LED’s inside to indicate ON/OFF. Talk about plug-and-play! Aside from plugging and snapping it all together, the only electrical connection I had to make was the inline splice that supplies the switch with 12V power, and IPF even included the connector to make the splice!
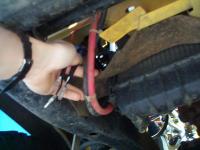
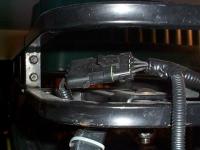
The wire leads from the relay to the lights themselves are relatively short, so I couldn’t mount the relay to the firewall as I’d originally planned. Not a big deal though, the switch leads are extremely long, so I just drilled a hole in the header behind the passenger-side headlight and mounted the relay there.
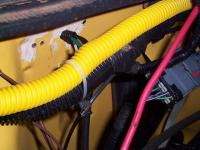
I ran the wires down the side of the radiator and AC condenser, then out under the grill and back up to the lights behind the bumper. This routing worked out great and I didn’t need to worry about zip-tying any of the wires out of the way.
 |
 |
I ran the power and switch leads from the relay along the top of the fender just inside the “hood lip”. The power lead hooked onto the positive terminal of the battery of course, and I ran the switch leads up along the firewall and through the plug/grommet that I’d used previously for some other wiring projects.
From there I plugged the leads into the mini-harness for the switch and zip-tied the bundle of wires up and out of the way behind the dash. I ran the yellow 12V lead behind the center console and spliced it into a circuit on the fuse block that was only hot when the ignition was on. The instructions (which are pretty good) say to connect this lead to the high-beam wire on the headlights, but I personally don’t like having my auxiliary lights dependent on my headlights.
 |
 |
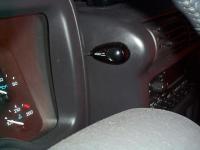
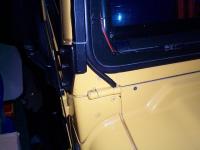
I wanted the install to look as clean as possible, so to run the switch wiring I unscrewed the lower dash knee panel and took out one of the screws holding the upper dash bezel on. Then I slipped the switch wire bundle through and bolted the dash panels back up. Now the switch wiring is nearly invisible as it runs behind the dash directly from the switch.
I decided to mount the switch on the top center section of the dash, just to the side of the air vents. This would put the switch within easy reach from the steering wheel. ARB is out of Australia, where the vehicles are all right-hand drive, so it wasn’t too surprising when the markings on the switch were upside down where I mounted it – I figure it was probably designed for the OTHER side of the dash.
The IPF wiring harness really isn’t long enough to use with roof-mounted lights, so I just setup a custom harness for the lights on the rack similar to what I’d done for our rocklights using one of the existing dash switches I’d put in a few weeks earlier and a single 30amp relay.
 |
 |
The power leads to the lights run into the cowl area through a hole drilled in the firewall. You’ll need to pull off the windshield wipers to get the the cowl panel off. There are 3 screws on the top of the cowl and 4 hidden behind the weather-stripping that runs along the top of the firewall.
From there they run out the side of the cowl by the windshield hinge and up the front support leg of the rack. If you’re very careful, you can run the wires out under the edge of the cowl by the hinge without damaging or pinching the wires.
 |
 |
The lights need to be unplugged to let the rack tilt back so we could take the soft top up and down, so I picked up a 4-way weatherproof quick-disconnect plug from PepBoys. The plug ran about $3-$4 and is working out great so far. The wires leading to and from the plug are all power leads for the roof lights – there was no need for me to run separate ground wires down to the body because the rack itself is grounded to the body at it’s mounting points.
So far we’ve been very happy with the new lights. They don’t put out near the amount of light as the 100W LightForce lights on my XJ, but then they’re not designed to compete against those kind of lights anyway. The combo light pattern of the new IPFs is just about perfect for lighting up dark country roads both ahead and to the sides, and should work just as well for lighting up the trails at night. Admittedly, the roof lights are probably more for show than anything else, but they should help out when leading nighttime trail runs or setting up camp in the dark.
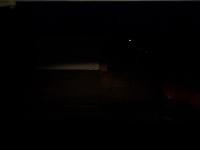
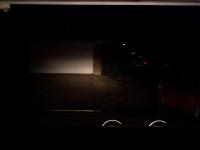
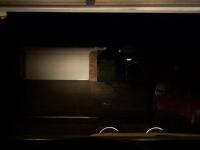
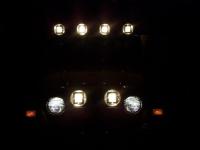
Unfortunately my digital camera doesn’t work too well at night, but this should give you an idea of the output of the lights. The garage the lights are shining on is about 75 feet away. The left photo is of the TJ’s IPF headlights with 80W PIAA Plasma bulbs on lowbeam. The middle shot is of the headlights plus the IPF 968s on the bumper. The last shot is of the headlights, bumper lights, and the roof lights all turned on.
80W IPF headlights headlights & bumper lights headlights, bumper lights, & roof lights
 |
 |
 |
Some more photos…
 |
 |
 |
For more information, contact:
DPG-OffRoad
PO Box 190
Rose Hill, KS 67133
316-776-9900
http://www.dpgoffroad.com