


 |
Changing disc brake rotors and pads |
Things you’ll need:
- hydraulic jack
- metric socket wrench set (if working on ’92 or newer Jeep)
- allen key set (if working on ’91 or older Jeep)
- standard open-end wrench set
- pliers (if replacing the rotors)
- anti-seize compound (optional)
- brake fluid
- brake cleaner
- wire brush
- clear tubing and a small container (available as kit for ~$5 at AutoZone)
- medium sized c-clamp (needs to open at least 4″)
- caliper spreader tool (optional, available for $6 at AutoZone)
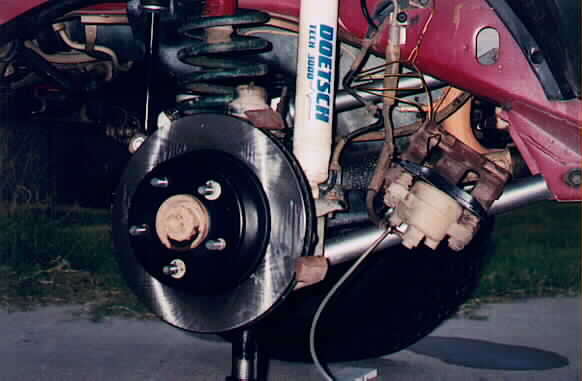
1. Jack up the vehicle and remove the wheel on the side you’re going to work on.
2. Remove the 2 caliper bolts on the back side of the caliper. If you have a ’91 or older Jeep these bolts will be allen head bolts. If you have a ’92 or newer Jeep, they should be regular 13mm bolts.
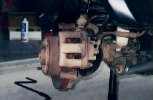
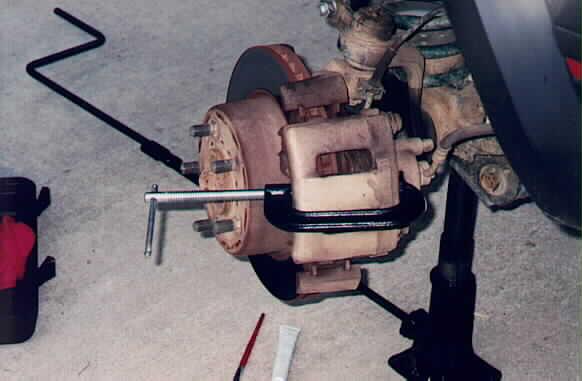
3. Place the c-clamp on the caliper so that the solid end is against the back of the caliper and the screw end is against the metal part of the outside brake pad.
4. Tighten the clamp a couple of turns, this will compress the piston into the cylinder enough for you to easily remove the caliper without damaging the rotor.

5. Loosen the clamp and remove it.
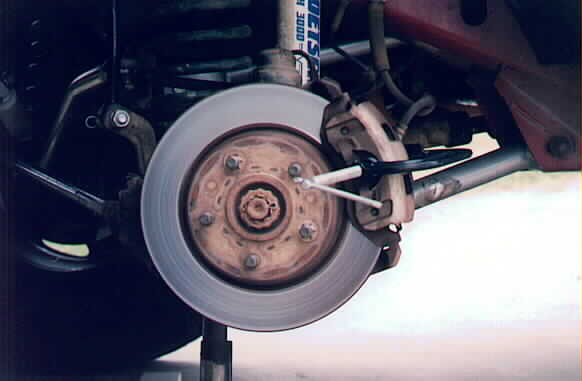
6. Rotate the top of the caliper back and lift it off the rotor. Do not let it hang by the brake line, you can use a bent coat hanger to hold it, or zip-tie it to a control arm, or set it on something. I personally used a coat hanger so that I could easily work with the caliper, plus, it’s kinda hard to zip-tie it up with only two hands and it didn’t occur to me at the time to get a big can or block to set it on…
7. If you’re just replacing the pads and not the rotors also, skip to #10.
8. There will probably be two clips holding the rotor on the hub assembly, you need to remove them before you can remove the rotor. I used a flathead screwdriver to pry the edges of the clips up enough to grab them with some pliers and unscrew them. Try not to destroy the clips, you will use them later to help hold the rotor on the hub.
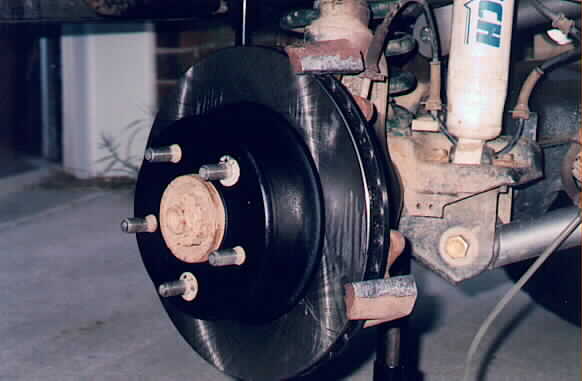
9. Remove the old rotor and install the new rotor. If you’re going to put anti-seize compound on the riding surfaces of the knuckle, it’s easier to do it before you install the new rotor. If the old rotor is stuck, just hit it with a hammer, after all, you’re replacing it right? It might be helpful in the future to apply some anti-seize compound to the mounting surface of the hub to keep the new rotor from getting stuck to it later on. Put the clips back on to help hold the rotor on while you’re working. Clean the rotor with brake cleaner.
 |
 |
10. Remove the old brake pads from the caliper, you may need to bend up the metal tabs of the outside pad to get it off. The inside pad just pulls out of the piston.
11. Pull the boot off the bleeder valve on the back of the caliper and place one end of the tubing on the valve end, place the other end in a container. Use a small wrench to loosen the valve. You only need to loosen it about half a turn.
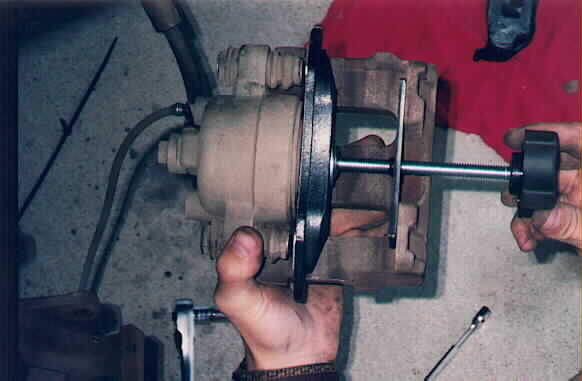
12. Using a c-clamp or a caliper spreader tool, place a block of wood against the piston and press the piston into the caliper until it is flush with the caliper or until it stops. You should see brake fluid flowing through the clear tubing. You need to use clear tubing so that you can see the fluid and any air bubbles that might be in the tubing. I used a spreader tool and it worked like a charm, definitely worth the $6 I paid for it.
note: you can push the piston back into the caliper without opening the bleeder valve, but you run the risk of pushing contaminated fluid back up into the master cylinder and overflowing the reservoir.
13. Tighten the bleeder valve and then remove the clamp. Make sure no air got back up the tube and into the caliper. Remove the tubing and put the container in a safe place. Brake fluid will bubble paint and may cause a chemical burn on skin if it’s not washed off within a few hours.
14. Put the new pads on the caliper. There is a pair of pads for the passenger side, and a pair for the driver side, so make sure you get the right pair on the right side.
15. Slide the caliper back over the rotor, making sure the pads are seated properly on the riding surfaces of the knuckle.
 |
 |
16. Reinstall the 2 caliper bolts.
17. Check the brake fluid reservoir under the hood to see if you need to put more fluid in. Fill the reservoir if needed.
18. Repeat for the other side.
19. Test drive.
If the brakes feel spongy, you will need to bleed them, but you shouldn’t encounter this problem using the procedure above.
Some suggestions from Sean B. of the XJ-List:
While you have everything apart, I suggest using a stiff brush (I use a brass bristled wire brush about the size of a toothbrush) and cleaning all the crud off the surfaces that the pads “ride” on…then use some sort of heat resistant lubricant (I use permatex anti-seize compound…the silver goop in a silver can with a brush attached to the lid)…brush this on liberally to the backs of the pads (I’ve found it’s better than the anti-squeek stuff), on the “riding” surfaces, and on the caliper bolts. ****if you get any lubricant on the pads or rotor, use brake cleaner…spray it on a rag and wipe the pads and rotors clean***. (I prefer to spray on a rag rather than spray the brakes directly, since spraying directly would negate the lubing.) Then after everything is assembled (before you put the tires back on) spray brake cleaner on a rag, and wipe down the rotor again…replace tires. I’ve found that, by doing the above, I have much quieter brakes and with everything clean and lubed, I get better braking because there’s no binding.
Comments are off for this post