


 |
Build a hard deck for your XJ’s cargo area |
Article by Greg Friedman
One of the dilemmas I had when deciding to buy an XJ is that the rear compartment is awful small, even with the seat folded down. It’s too short to sleep on comfortably, only one person fits, and you can’t really stretch your legs out even when laying diagonally. But even if I do this, I’ve got to clear out ALL the gear to make space. I also take my dog wheelin’ and camping with me, and there’s just not enough room for people, gear, and a dog. I came up with a pretty good solution that gives me a lot of storage, allows me to stretch out more, and I can remove part of it to use the rear seat.
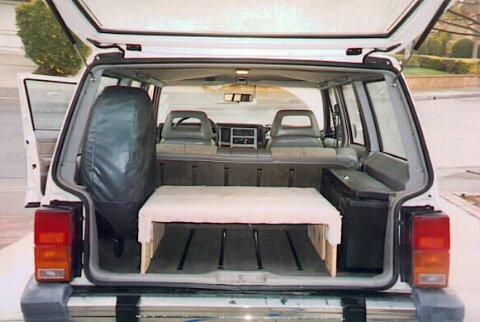
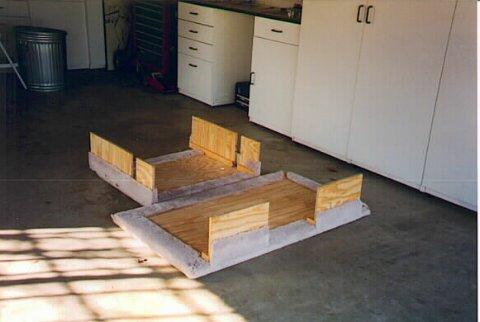
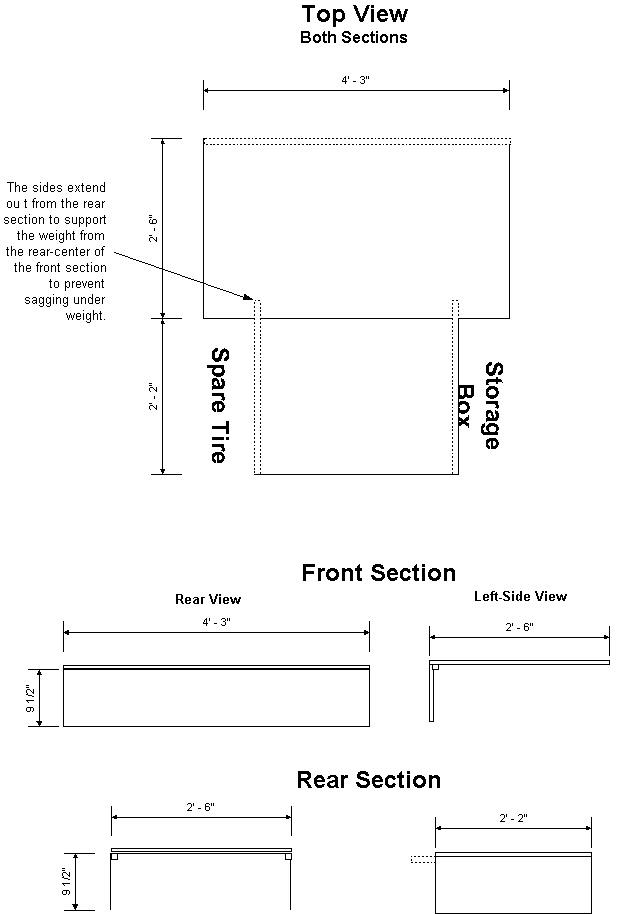
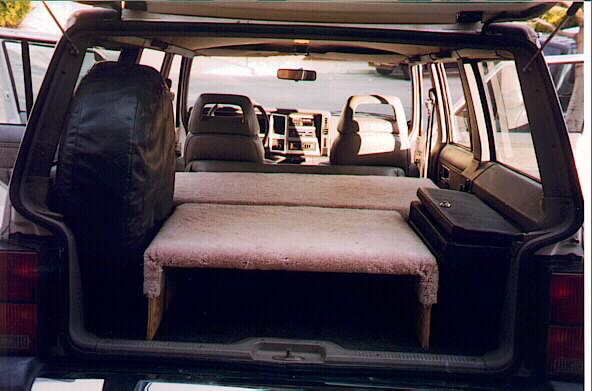 Basically, it’s a two-piece riser in the rear compartment with about 9.5″ of space below for storing gear. The top is completely flat and goes over the wheel wells for more usable space. It is made in two pieces, front and rear, so I can take the front section out and put the rear seat up. This also makes it easy to take in and out. The top is carpeted with padding underneath so it’s somewhat cushy to sleep on. As you can see, I have both a spare tire and a utility box on either side of the rear hatch, so the front section is much wider than the rear.
The reason that it’s about 9.5″ tall is that the wheel wells are that height and I wanted them to provide support for the rear of the front section. I could’ve made it taller using some spacers, but I have a large dog that needs to be able to stand up. The platform is about 8 or 9 inches below the windows.
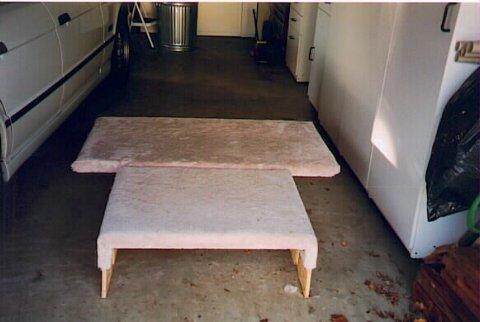
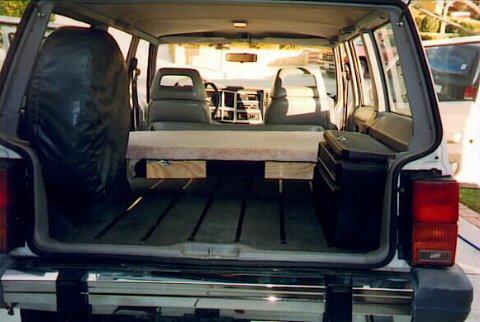 The front section is very straight-forward. It’s a 5/8″ piece of ply wood 51″ wide by 30″ long including the carpet and padding that’s wrapped around and tacked underneath. It has another piece of plywood 9.5″ tall that’s butt-up against the bottom rear seat when it’s folded up, and runs the width of the platform. This provides support for the front portion of the front section. This support needs to holds the weight of two people, so connecting the two pieces of plywood together with screws is not sufficient. I used a 1″ X 1″ block along the width of where the two pieces of plywood are joined, and put the screws into the block. This works well. The front section gets its rear support from sitting on top of the wheel wells. I left the sides open for easy access underneath from either passenger door.
 The rear section was fabricated similar to the front, except the supports run along its length rather than the width. There is no support from either wheel well in my case because the spare tire and utility box require the rear section be more narrow. I also used the 1″ X 1″ blocks for the supports as I described for the front section. The plywood just isn’t strong enough to support the screws when significant weight is placed on top. I have the 1″ X 1″ blocks extending about 6″ past the front of the rear section. This helps support the front section from sagging in the center, although in hindsight, I’m not sure it was necessary.
I may go back at some point and add some sort of hinge mechanism to the 9.5″ plywood supports so they fold up making the sections easier to store when not installed. I would also make the front section a couple of inches shorter (and the rear section a couple of inches longer) to make it easier to take in and out. Also, when the front section is removed and the rear seat is up, there’s a gap between the rear section and the rear seat. That’s either a design flaw, or a feature (because you can reach back and grab stuff), depending on your perspective.
When cutting the carpet to size, you want to leave about 3″ or 4″ around all sides so that the carpet can be wrapped underneath and securely tacked. I cut the padding to the size of the plywood. I also used carpet pad glue to keep the pad from slipping. You’ll need to cut the corners off of the carpet so you get a nice clean corner after each side is folded over. Otherwise the folds will overlap on top of one another. I don’t have specific measurements, so you’ll have to experiment a little with the folds beforehand to get it right. Practice with some paper, folding the corners over to get them aligned after the fold. It’s not that difficult.
Materials cost about $65 or $70, and probably half of that was for the carpet and padding. I bought the thick stuff for comfort, and chose not to use a thinner piece that I already had in my garage. It only took about three hours to design and build.
 |
 |
 |
The length issue for sleeping wasn’t really solved, but with the increased height of the surface, I can stick my legs or head through between the front seats since the surface is just below the top of the rear seat when it’s folded up. This works sufficiently for me at 5’-10″. Also, It’s amazing how much gear I can get underneath, and it’s fairly easily accessible through the rear hatch or doors. The only thing I really can’t fit underneath is an ice chest. A surprise benefit is that road noise is significantly reduced when both sections are installed.
– Greg Friedman
email: gfried@earthlink.net